| Wolffe | |
|---|---|
| |
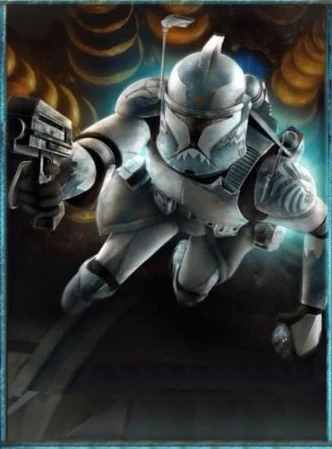
| Commander Wolffe - By: KONAMI | |
Vital statistics
| |
| Position | Clone Trooper Commander |
| Age | Unknown |
| Status | Alive |
Physical attributes
| |
| Height | 1.83 Meters |
| Weight | 80 Kilograms |
CC-3636, also known by the nickname "Wolffe", was a Clone Trooper Commander who served under General Plo Koon in the 104th Battalion during the Clone Wars. He was also leader of a clone squad named the Wolfpack, a group he served with throughout the Clone Wars. A seasoned veteran and battered soldier, Wolffe saw some of the worst the war has to offer. In the early time of the war, Wolffe had lost his entire command when Plo' Koons flagship, was destroyed by the despicable General Grievous. Despite such tragedy, he fights on bravely, proudly brandishing his scars and instilling loyalty among his men. Sometime after the war, Wolffe retired from service and lived with fellow clones Rex and Gregor on the planet Seelos.
Biography[]
Service to the Republic[]
Facing the Malevolence[]
CC-3636, also known as "Wolffe," was born on Kamino as a clone of Jango Fett to serve in the Republic's Grand Army. During the Clone Wars, Wolffe was assigned to General Plo Koon, with whom he developed a close working relationship. Wolffe commanded a clone unit in the 104th Battalion called "Wolfpack", known for being extremely close-knit; it was he who chose the unit's original colors. Some months into the Clone Wars, Wolffe and Plo were dispatched to investigate a series of attacks on the Republic fleets which always left no survivors by the leader of the Droid Army, Grievous, in his secret weapon the Malevolence. The Wolfpack and Koon set out aboard the Triumphant, with two other Star Destroyers as support, and tracked Malevolence to the Abregado System.
Wolffe informed Koon that the Malevolence had spotted them and had reduced its speed, prompting Jedi Master Plo Koon and Wolffe reported their position and request reinforcements to the nearest Republic military presence: the fleet of Jedi Knight Anakin Skywalker and his Padawan learner Ahsoka Tano, who were in the nearby Bith System. However, the signal was lost when the Separatists jammed signal, and began their surprise attack. General Grievous then fired its secret superweapon: a massive ion cannon. The ion blast engulfed all Star Destroyers and shut all the power systems and equipment; leaving them dead in space. The now defenseless fleet fell under turbolaser fire from the Malevolence. Pro Koon, realizing the fleet was lost, ordered the evacuation of the crew to its escape pods. Wolffe, Plo Koon, along with troopers Sinker and Boost boarded a pod, and ejected into space just as the Triumphant exploded; turning the fleet into a graveyard and killing all of the Wolfpack—save Wolffe, Sinker and Boost. The group, alone drifting in the debris field, was unsure that anyone would come rescue them, except Koon, who was sure of it. Soon after the loss of their vessel, Wolffe learned the pod's power grid was down, leaving them with little air supply and no way to contact help.
Surviving the Malevolence[]
Koon reasoned that if they got the power restored they would survive long enough to be found, assuring them that if they worked together they would survive, therefore, the inevitable rescue party would save them. Just then, another pod appeared through their pod's viewport, but the clones within the pod fell victim to the rocket battle droids manning a boarding ship and their pod had been "cracked open", the clones floating dead in the vacuum. Disturbed by the sight, Boost and Sinker quickly restored the power, so Commander Wolffe manned the comm system to search for rescue craft. However, another pod nearby broadcast a distress signal because the battle droids were attacking them. Wolffe made visual contact with the pod just as the droids cut into the pod and killed the troopers; leaving Koon, Wollfe, Sinker and Boost as the sole survivors of the battle. The droids spotted the group’s pod and headed towards it, forcing Koon to quickly decide to meet the enemy face-to-face with his breath mask and Boost and Sinker’s armor would protect them from the vacuum. Woffe, however, who was armor-less, remained inside the pod to ensure the signal remained broadcasting, as it was their only chance of survival. The Jedi and the troopers fought the droids, who had latched on to the pod with the boarding craft's pincers and activated the "squeeze" feature on the droid craft that damaged the pod.
Wolffe picked up a signal from Ahsoka Tano and Anakin Skywalker, who had come to search for survivors against direct orders. Wolffe informed Koon, who ordered him not to lose the signal as the droid’s craft damaged the pod enough that it began to lose pressure, therefore, Koon destroyed the craft using his Lightsaber and the Force, defeating the droids. Koon, Boost and Sinker remained outside of the doomed pod to allow Wolffe more oxygen as he used his the Force to relay their position to Tano. She and Skywalker quickly located them, and Skywalker used a tow cable to pull the pod into the hold of his freighter, the Twilight. Skywalker popped the viewport from the pod using the Force, allowing Wolffe, who was coughing and weak from a lack of oxygen, to sit and rest while a medical droid tended to the clones. Grievous, at the helm of the Malevolence, after learning the rocket droids had been killed, returned to the debris field to locate the survivors. Koon, Skywalker and Tano, in the Twilight's bridge, shut down all the systems and the astromech, R2-D2. However, the 2-1B, TB-2, was not shut down and the Malevolence picked up the droid's signal and fired an ion blast at the Twilight as a result. Skywalker used his skills as a pilot to escape the ion blast, and the Twilight rendezvoused with Skywalker's fleet, where Wolffe thanked Tano and Anakin for rescuing them, glad that Koon's faith had come to pass.
Later Conflicts of the War[]
Some time later, the Wolfpack's ranks were replenished with new soldiers and Commander Wolffe and his battalion took part in a battle on the planet Khorm. During the fighting, Wolffe was permanently scarred when Dooku's assassin Asajj Ventress cut his right eye, leaving a long scar across the right side of his face. He later had a cybernetic replacement installed. Despite his injury, Wolffe continued to serve and lead his troops. Following the Battle of Khorm, Wolfpack and Koon were deployed on the Negotiator, to break the Separatist blockade of the planet Felucia. The Republic forces, led by Jedi General Obi-Wan Kenobi, Anakin Skywalker and Ahsoka Tano, had been overwhelmed by the droid army, so Koon led a group of Low Altitude Assault/infantry gunships and V-19 Torrent starfighters through the blockade in order to rescue Skywalker and his troops, while Wolffe oversaw the battle in space against the enemy ships. Wolffe directed the clone gunners to target and destroy the Confederate Munificent-class star frigates. Meanwhile, Koon and the rest of the Wolfpack extracted Anakin Skywalker, Ahsoka Tano, Obi-Wan Kenobi and the clone soldiers and brought them to safety aboard the Negotiator. They then returned to Coruscant, having completed the rescue mission. After Eeth Koth was captured, Wolffe discovered a coded message from Koth that told him that Grievous was heading to Saleucami.
Wolffe then assisted Master Plo Koon and Ahsoka in rescuing Mace Windu and Anakin Skywalker from the wreckage of the Endurance on Vanqor. He also went with Master Plo Koon to rescue Skywalker's, Kenobi's, and Ahsoka's team from the Citadel on Lola Sayu. Some time later Wolffe and his squad received an armor upgrade to Phase II and took part in a attack on a Separatist outpost on Felucia, commanded by General Grievous. However, while everyone were distracted by the ongoing battle, Commander Tano was captured by a Trandoshan hunter and was brought to the moon Wasskah, where the Trandoshans used to hunt sentient beings for sport. After the battle on Felucia was over, the group noticed Tano was missing and Anakin launch a huge mission to find her, with no results. However, a Wookiee relief force aided by bounty hunters rescued Tano and her friends and brought them back to the Jedi Temple. While en route to resupply Koon's forces, Wolffe was ordered to drop off relief supplies to Aleen. Wolffe also had the protocol droid, C-3PO and the astromech, R2-D2, much to his annoyance. Once on Aleen, Wolffe spoke with the inhabitants and set up their supplies. After the mission, Wolffe and his men then dropped the droids off with Master Adi Gallia. Wolffe then boarded Grievous' ship with Plo Koon and his men to rescue Galia. Wolffe then found C-3PO and R2-D2 and took them back to their ship.
Wolffe then went to the Zygerrian Slave Empire's processing facility on Kadavo with Koon and Admiral Coburn. He then assisted in rescuing Kenobi, Rex, Skywalker, Ahsoka, and Kiros's Togrutas from plunging to their deaths. Commander Wolffe then attended the Republic's strategy conference at Valor. Wolffe then took a squad consisting of shock troopers to Coruscant's underworld to find Tano and ascertain if she was really behind the bombing at the Jedi Temple. During his search, he found Tano with Dooku's former assassin turned bounty hunter Ventress. He tried to take them both, but was subdued by Ventress. Wolffe later found Tano at Level 1315's warehouse and stunned her. Nearby, he found a crate full of Nano-droids, the same devices used in the bombing of the Jedi Temple, leading him to assume that Tano was the one responsible. Tano was expelled from the Jedi Order and turned over to the Republic for trial, but she was ultimately cleared of any wrongdoing after Anakin Skywalker identified Padawan Barriss Offee as the true culprit. Wolffe then went with Koon to one of the moons of Oba Diah. There they found the shuttle that belonged to Jedi Master Sifo-Dyas. They also find Sifo-Dyas' Lightsaber in the shuttle and reported it back to the Jedi Council. Clone Commander Wolffe then went to Ord Mantell with Aayla Secura where they found evidence linking the recent battle to the Shadow Collective.
Retiring from Service[]
Assisting the Rebellion[]
Wolffe survived the Clone Wars and at some point removed his control chip. In the years after the Empire's birth, Wolffe was living with Captains Rex and Gregor in a modified AT-TE on Seelos, having managed to remove their control chips that forced them to follow Order 66. Several years before the Battle of Yavin, they were contacted by the rebel crew of the Ghost, who were sent by Ahsoka Tano to acquire locations of Outer Rim bases for the rebellion. When rebel Kanan Jarrus identified the clones and drew his Lightsaber, Wolffe identified him as a Jedi and assumed that he had come for revenge, prompting him to open fire on the Jedi. Rex managed to break up the fight before Ezra Bridger revealed that Ahsoka Tano sent them. Wolffe later privately discussed whether or not to aid the rebels with his brothers, fearing that retribution would come from the Empire if they did so. Unbeknownst to his brothers, Wolffe had secretly informed the forces of the Galactic Empire that Jedi were present on Seelos. Subsequently, Wolffe drove the AT-TE as the clones and crew of the Ghost went hunting for joopas, using Garazeb Orrelios as bait. After successfully luring and killing the joopa, Kanan Jarrus desired to get their intel and leave, though Rex was able to convince him and the others to stay for dinner.
As Sabine Wren was granted access to the clones' database, she discovered that one of them has alerted the Empire. Rex realized Wolffe tipped them off, who regretfully admitted to alerting the Empire to protect his fellow clones from persecution for helping the Jedi, as well as having hidden the messages that Tano had sent Rex. Rex then managed to convince him that the Empire was the true enemy. Subsequently, they discovered a probe droid had been spying on them before Rex shot it down. Afterwards, the group prepared for an imminent invasion from the Empire. While the Spectres urged the clones to come with them and join the rebellion, Wolffe and his fellow Clones insisted on staying behind to delay the Imperials so that the Ghost crew could escape. During the Imperial assault on Seelos, Wolffe and his companions rode their AT-TE against Agent Kallus' three AT-AT walkers. Despite being outnumbered and outgunned, the clones were determined to go down in a blaze of glory. However, Bridger convinced his fellow rebels to help the clones. Flying the Phantom, the rebels succeeded in hijacking one of the AT-AT walkers and using it to immobilize the other Imperial walkers; forcing Agent Kallus and his surviving crew to retreat into the desert. Following the battle, Rex joined the rebels whilst Wolffe and Gregor stayed behind on Seelos, taking the remaining AT-AT for their new home.